
How to Sell Clothing Online: 10 Smart Listing Tips
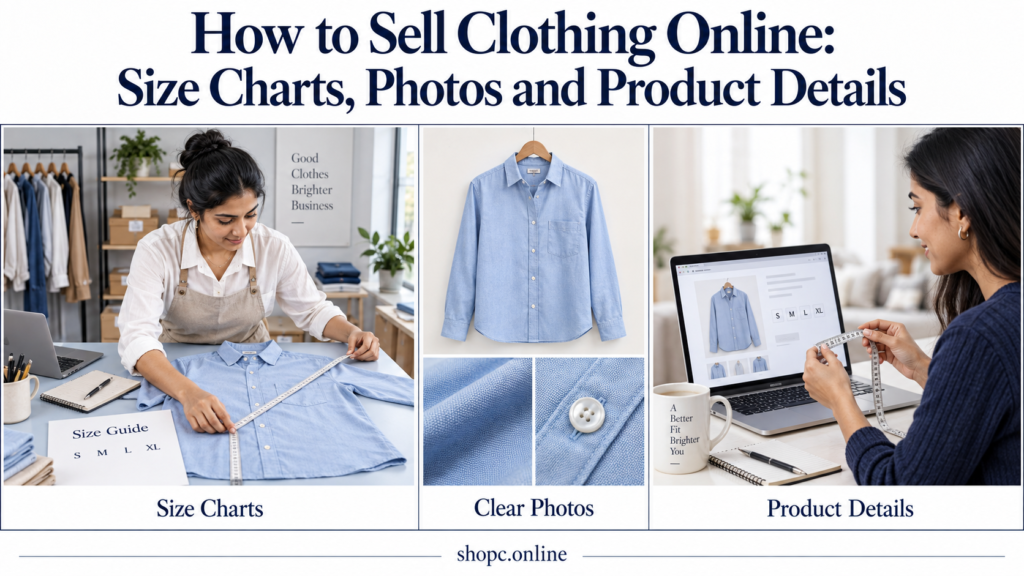
How to Sell Clothing Online: Size Charts, Photos and Product Details
Learning how to sell clothing online starts with answering the questions customers usually ask in a shop: Will this fit? What does the fabric feel like? Is the colour accurate? What exactly comes in the package?
A photograph may attract attention, but a clear size chart and useful description help someone decide whether the garment is right for them.
For a T-shirt seller in Tiruppur, a boutique in Chennai or a clothing shop in Salem, accurate listings also make daily work easier. Customers can find essential information without repeatedly asking about measurements, materials and available sizes.
This guide explains how to prepare clothing listings that support both your business and the people buying from it.
How to Sell Clothing Online with Better Product Listings
1. Start with a Collection You Can Describe Accurately
Choose a manageable selection of garments before uploading your entire stock.
Begin with items whose fabric, measurements, colours and availability you can verify. Group products sensibly, such as everyday T-shirts, office-wear kurtis or casual shirts.
For each design, gather:
- Product name and stock code.
- Verified fabric composition.
- Available sizes and colours.
- Measurements for each size.
- Photographs of the actual design.
- Price and stock quantity.
- Care instructions.
- Package contents.
Do not assume that two garments from the same supplier have identical sizing. Check each style and review new batches for changes.
Customers benefit when the information belongs to the exact product they are viewing.
2. Distinguish Body Measurements from Garment Measurements
This is one of the most important parts of a clothing size chart.
Body measurements describe the person, such as chest, waist or hip circumference.
Garment measurements describe the finished item, such as its width when laid flat or its shoulder-to-hem length.
Label the chart clearly. A “chest: 50 cm” entry is confusing unless you explain whether it means body circumference, garment circumference or flat chest width.
For example, a T-shirt measuring 50 cm across the chest when laid flat has an approximate garment chest circumference of 100 cm. That does not automatically mean it fits someone with a 100 cm chest comfortably.
Fit also depends on the cut, stretch and the space between the body and garment, often called ease.
For customers, comparing garment measurements with a similar item that already fits well can be useful.
3. Create a Size Chart for Each Style
Letters such as S, M and L are labels, not universal measurements.
Provide the measurements customers need for the particular garment. A shirt may need chest width, shoulder width, sleeve length and overall length. Trousers may need waist, hip, rise and inseam information.
Here is a fictional example for one T-shirt style:
| Label size | Flat chest width | Body length | Shoulder width | Sleeve length |
|---|---|---|---|---|
| S | 48 cm | 66 cm | 41 cm | 19 cm |
| M | 51 cm | 69 cm | 43 cm | 20 cm |
| L | 54 cm | 72 cm | 45 cm | 21 cm |
| XL | 57 cm | 75 cm | 47 cm | 22 cm |
These are illustrative garment measurements, not a standard size chart or ShopC product specification.
Replace the figures with measurements taken from your own stock. Explain the measuring method and state any verified manufacturing tolerance.
If you provide both centimetres and inches, check the conversion and use consistent rounding.
For children’s clothing, include relevant measurements rather than relying only on age labels.
4. Show Customers How to Measure
A chart is more useful when people know how the measurements were taken.
For a basic T-shirt, you could explain:
- Lay a similar, well-fitting T-shirt flat.
- Smooth it gently without stretching the fabric.
- Measure straight across the chest between the underarm points.
- Measure the body length from the stated shoulder point to the hem.
- Compare those figures with the listing’s garment measurements.
Use a simple labelled photograph or diagram showing the measurement points. Measure your stock using the same method.
For elastic-waist clothing, distinguish the relaxed waist measurement from a comfortably stretched measurement. Explain whether the number is a flat width or a circumference.
Avoid telling every customer to “buy one size larger.” Offer advice based on the actual chart, garment cut and preferred fit.
5. Photograph the Front, Back and Important Details
Good clothing product photography should help buyers inspect the garment.
A useful photo set includes:
| Image | What customers can check |
|---|---|
| Full front view | Overall shape, colour and design |
| Full back view | Back pattern, length and construction |
| Fabric close-up | Texture and surface detail |
| Detail photograph | Buttons, zip, pockets, embroidery or seams |
| Worn or mannequin view | Drape and proportions |
| Size-guide image | Measurement points and fit information |
Photograph each colour accurately. Selecting a blue variant should not leave the customer looking at a black garment.
Use soft, even lighting and avoid filters that change the colour. Remove distracting creases where appropriate, but do not edit away defects or alter the shape.
If a model is shown, give their height and the size worn when you have accurate information. Disclose styling adjustments, such as clips used to change the apparent fit.
A short video can show movement and drape where the platform supports it.
6. Describe Fabric and Fit in Plain Language
Customers cannot touch the material, so explain it clearly.
State verified fibre composition rather than guessing from appearance. Do not describe a blend as “100% cotton” unless you have reliable confirmation.
Include useful details such as:
- Whether the fabric stretches.
- Whether the garment is lined.
- Whether lighter areas are sheer.
- Whether the material feels smooth, textured or structured.
- Whether the cut is fitted, regular, relaxed or oversized.
- Whether the garment has functional pockets.
Fit labels should be supported by measurements. “Oversized” is not a replacement for a size chart.
Avoid unsupported claims such as “shrink-proof,” “colour will never fade” or “suitable for every body type.”
For Tamil Nadu customers, a short Tamil explanation may help where the platform supports it. Keep the specifications consistent across languages.
7. Write Specific Titles and Useful Product Descriptions
A product title should identify the garment without making the customer open several pages.
A practical structure is:
Colour + verified fabric or material + product type + key feature
Examples include:
- Navy Cotton Crew-Neck T-Shirt with Short Sleeves.
- Maroon Printed Kurti with Side Pockets.
- Beige Cotton-Blend Trousers with Elasticated Waist.
Use only details that apply to the actual product.
Then write a short description explaining the design and fit, followed by a specification table.
Google’s guidance on helpful, reliable content encourages information that serves readers. For clothing listings, that means answering buying questions rather than repeating “best clothing online” throughout the page.
Write original descriptions based on your stock. Check supplier information before copying it into a listing.
8. Make Price, Variants and Package Contents Clear
Customers should know exactly what the displayed price covers.
For a kurti photographed with trousers and a dupatta, state whether the package includes the kurti only or the full set. The same applies to belts, jewellery and other styling accessories.
Keep stock records for each size-and-colour combination. A medium blue shirt and a large blue shirt are separate variants with separate quantities.
Check that:
- The selected size is available.
- The image matches the chosen colour.
- Any price difference is visible.
- Set contents are listed accurately.
- Unavailable variants cannot be ordered accidentally.
Calculate your selling price using product cost, packaging, applicable platform charges and other relevant expenses. Confirm current marketplace fees rather than assuming them.
9. Explain Care, Delivery and Returns Before Purchase
Use care instructions that match the garment’s label and verified supplier guidance.
Customers may need to know about washing temperature, drying, ironing or special handling. Do not give every fabric the same instructions.
Separate preparation or dispatch time from delivery time, especially for made-to-order or altered garments.
ShopC’s shipping policy explains that availability depends on the delivery pincode and the serving vendor’s delivery radius.
The ShopC returns and refunds page states that eligibility can vary by product and vendor. Customers should check the conditions for the specific item before ordering.
Explain any applicable conditions involving alterations or customised garments before the customer commits to them.
Clear policy information helps buyers decide and gives sellers a consistent process for handling enquiries.
10. Review the Listing on a Phone
Before publishing, open the product page on a mobile screen.
Can you read the size chart without struggling? Does the correct image appear when you change the colour? Are fabric details and package contents easy to find?
Check the title, chart, photographs and description against the actual garment.
After orders begin, review recurring questions and return reasons. If customers repeatedly misunderstand the length or fit, improve the listing rather than answering the same question indefinitely.
Knowing how to sell clothing online includes maintaining accurate information after the first upload.
Sample Clothing Product Listing
The example below is fictional. Replace every detail with verified information about your own garment.
Navy Cotton Crew-Neck T-Shirt with Short Sleeves
This navy T-shirt has a crew neckline, short sleeves and a straight hem. It is made from cotton jersey and has a regular cut. Check the garment measurements before selecting your size, especially if you prefer a closer or looser fit.
The package contains one T-shirt. Trousers and accessories shown in styled photographs are not included.
| Product detail | Example information |
|---|---|
| Product type | Short-sleeve T-shirt |
| Fabric composition | 100% cotton, verified for this example |
| Colour | Navy |
| Neckline | Crew neck |
| Fit | Regular |
| Available sizes | S, M, L and XL |
| Size guide | Style-specific garment measurements |
| Package contents | One T-shirt |
| Care | Follow the garment’s verified care label |
A real listing should also display its price, current stock, care instructions, delivery information and applicable return conditions.
What Customers Should Check Before Buying Clothing Online
Compare Measurements, Not Just Size Letters
Your usual size may differ between brands and styles. Check whether the chart describes body measurements or the finished garment.
Read the Fit and Fabric Details
A fitted woven shirt and a relaxed stretch T-shirt may feel very different even when their label sizes match.
Inspect All Photographs
Look at the back, fabric close-ups and construction details. Check that the photographs represent the selected colour.
Confirm the Package Contents
Make sure a styled photograph is not leading you to expect extra pieces that are sold separately.
Check the Full Cost and Return Conditions
Review the final payable amount, delivery estimate and item-specific return information.
For questions about an order or the platform, visit the ShopC contact page.
Common Clothing Listing Mistakes
| Mistake | Better approach |
|---|---|
| Using one chart for unrelated styles | Measure each style and provide the relevant chart. |
| Mixing body and garment measurements | Label the measurement type clearly. |
| Writing “free size” without dimensions | Give actual dimensions and useful fit guidance. |
| Using filters that change colours | Show accurate images under consistent lighting. |
| Listing a blend as pure cotton | Verify and state the composition. |
| Hiding what a set includes | List every supplied piece. |
| Leaving sold variants available | Update size-and-colour stock records. |
| Making universal fit promises | Explain the cut and provide measurements. |
Getting Started as a Clothing Seller on ShopC
Prepare a collection with accurate specifications, size charts and photographs before expanding your catalogue.
Review the ShopC vendor registration page and confirm the documents, current fees, payout terms and delivery arrangements relevant to your business.
Customers can browse the ShopC clothing and apparel section and review individual listings before choosing a garment.
Frequently Asked Questions
How Do I Sell Clothing Online as a Beginner?
Start with a manageable collection. Verify the fabric, measure each style, photograph the actual garments and calculate your costs. Review the marketplace’s seller terms before applying.
Should My Size Chart Show Body or Garment Measurements?
Either can be useful if clearly labelled and properly prepared. Garment measurements help buyers compare with clothing they already own. If you provide both, keep them separate and explain how to use them.
Can I Use the Same Size Chart for Every Product?
Only when it accurately applies to those products. Different cuts, materials and suppliers may require separate charts.
What Photos Does a Clothing Listing Need?
Include clear front and back views, fabric and construction details, and an image showing fit or drape where possible. Add photographs for each colour variant.
What Should I Tell a Customer Between Sizes?
Refer to the garment’s measurements, cut, stretch and the customer’s preferred fit. Do not automatically recommend sizing up for every product.
Do Better Listings Guarantee More Sales?
No. Demand, price, visibility, stock and service also matter. Accurate listings help customers make informed choices and can prevent avoidable misunderstandings.
Help Customers Choose Clothing That Suits Them
Learning how to sell clothing online means making the product understandable before it reaches the buyer.
Start with accurate size charts, honest photographs and clear fabric details. Keep your stock and policies current, and improve the information whenever customer questions reveal a gap.
For sellers: Review ShopC’s vendor registration requirements.
For customers: Browse clothing and apparel on ShopC and compare the details before ordering.
More from the blog

Selling Packaged Food Online: 10 Essential Seller Checks
Selling packaged food online? Check FSSAI requirements, labels, allergens, shelf life, packaging and…
View more →
Sell Home Décor Online: 10 Smart Listing Tips
Sell home décor online with clear photos, accurate dimensions and helpful product details. A practic…
View more →
How to Sell Handmade Jewellery Online: 10 Easy Steps
Learn how to sell handmade jewellery online with practical tips on pricing, photos, product descript…
View more →